Detailed guide on how to connect a printer to a MacBook M2
1. Guide to add the printer to the MacBook M2
1.1. Adding the printer via Wi-Fi
To connect the printer to the MacBook M2 via Wi-Fi, users can follow the steps below:
- Step 1: Click on the Menu, select System Preferences.
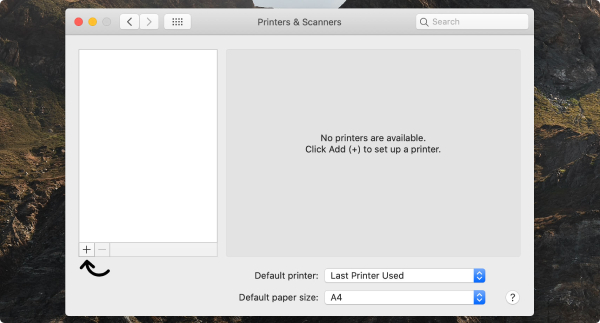
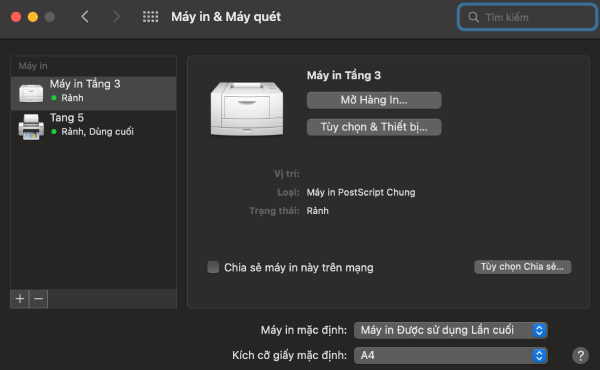
- Step 2: Click on Printers & Scanners, then find "Options for setting up printers". If you don't see your printer in the list, click on the "Add printer" option on the right and add the printer's information.
- Step 3: When your printer appears in the list, select it and click the Add button.

How to add a printer to Macbook M2 via Wifi
1.2. Connecting a printer to your MacBook M2 using an IP address
If you want to connect a printer and a Mac using an IP address, you can follow the steps below:
- Step 1: Select the Apple menu and go to System Preferences, then click on Printers & Scanners in the sidebar. (You may need to scroll down.)
- Step 2: Click on the Add Printer, Scanner, or Fax button on the right, select IP, and then enter the printer information as instructed below.
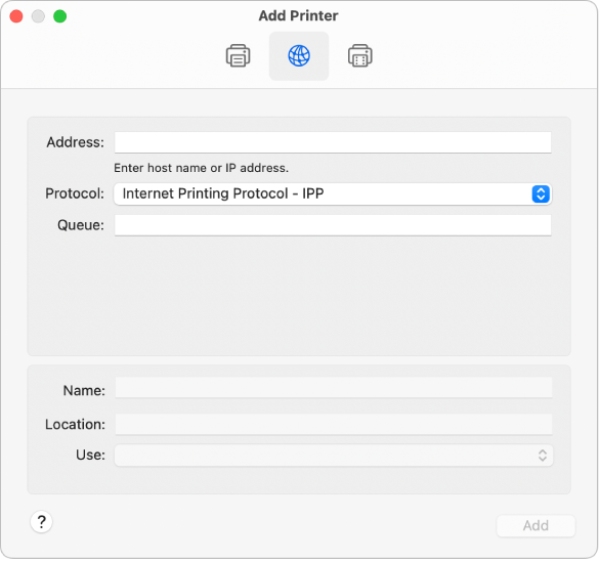
Users need to enter the printer information
Including:
- Address: Enter the IP address of the printer or server address.
- Protocol: The way to connect the printer to your MacBook. In this case, users select Internet Printing Protocol - IPP.
- Queue: Enter the queue name for the printer and it can be left blank.
- Name: A description of the printer to help users identify it in the Menu in case of connection with multiple other printers at the same time.
- Location: Similar to naming the printer, users can use location to identify the printer when turning on the Print Menu.
- Use: Select the appropriate software for the printer, usually Auto Select. If the menu does not display suitable software, go to "Select Software" to choose your printer from the printer software list. If that list doesn't include the printer you're using, try downloading and installing the printer software from the manufacturer.
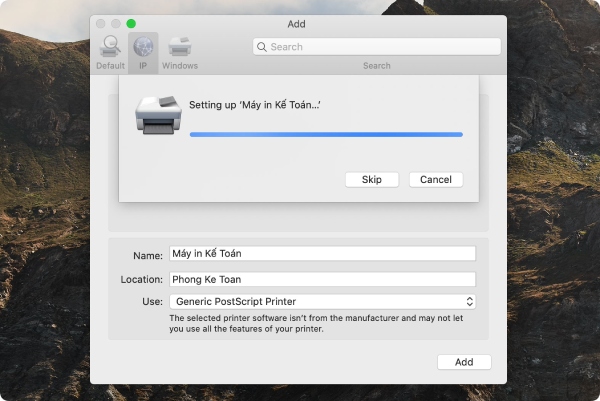
Once the user has completed filling in all the information, they can connect the printer to the MacBook
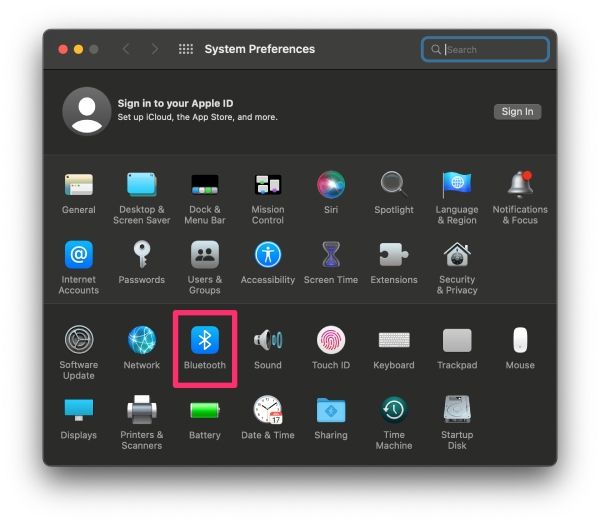
1.3. Connect a printer to MacBook M2 using Bluetooth
If your MacBook is equipped with Bluetooth or is using a Bluetooth USB adapter, you can connect wirelessly to a Bluetooth-enabled printer.
- Step 1: Select the Apple menu, go to System Preferences, then click on Printers & Scanners in the sidebar.
- Step 2: Click on the Add Printer, Scanner, or Fax button on the right, then click on the Default button.
- Step 3: Select the printer from the Printers list, and then click Add. If the printer you want to use is not in the list, enter the printer name in the search field and press Return. If your printer does not appear in the list, make sure you have installed the latest Bluetooth driver for the printer or contact the manufacturer for the latest driver.
1.4. Connecting a printer via USB port
Connecting a printer to a MacBook via USB is relatively simple:
Step 1: First, identify the connection port of the printer. Since the port of MacBook M2 is USB-C, if the cable is not integrated, you will need to use an additional converter port.
Step 2: Install the printer driver software according to the type of machine in use. If not available, you can download it through the links below (note that only download from the manufacturer or search for the download link on Google).
- Canon: https://support.apple.com/kb/DL1928?locale=en_US
- Brother: https://support.apple.com/kb/DL1927?locale=en_US
- Lexmark: https://support.apple.com/kb/DL1926?locale=en_US
- Epson: https://support.apple.com/kb/DL1925?locale=en_US
- Samsung: https://support.apple.com/kb/dl905?locale=en_US
Step 3: Press Command + Space and search for System Preferences.
Step 4: Choose Printer & Scanners.
Step 5: Press the plus (+) sign to add a new printer.
How to connect a printer to the USB-C port
Step 6: Select the printer name and press Add, then wait for the connection to establish
2. Guide to setting a printer as default on MacBook M2
In case the Print section displays "No printer selected," you can add a new printer. The first printer added will automatically be set as the default printer. However, users can change the default printer at any time.
- Step 1: On your Mac, select the Apple icon and go to System Preferences, then click on Printers & Scanners.
- Step 2: Click on the dropdown menu "Default printer" on the right, then choose an option. Select default printer
Select default printer in settings
If you want to set the current or most recently used printer as default, simply select that printer. The MacBook will remember the printer based on the network location. For example, the default printer can change depending on whether you are using the printer at home or at the office.
Tips: To quickly set the default printer, hold down the Control key while clicking on the printer in the Printers & Scanners section, then select "Set default printer."
The MacBook M2 offers users more connection options than previous models. We hope that the printer connection methods introduced above will help readers refer to and apply more easily in their work. In addition, to receive advice and experience the latest MacBook M2 version, you can contact ShopDunk via the following address:
- Website: https://shopdunk.com/
- Fanpage: https://www.facebook.com/shopdunk.store/
- Zalo/hotline: 1900.6626
ShopDunk offers many attractive promotions for customers such as: interest-free installment payments; up to 300,000 VND discount when purchasing accessories; free warranty... Don't miss the chance to own your dream laptop at an attractive price.
In 2020, ShopDunk becomes an authorized Apple reseller. We develop standard chain stores and Apple Mono Store to bring the best experience of Apple products and services to Vietnamese users.